Activities at home: Ramp and roll in the hallway
By Carla Pineda, Susie B. Grimm
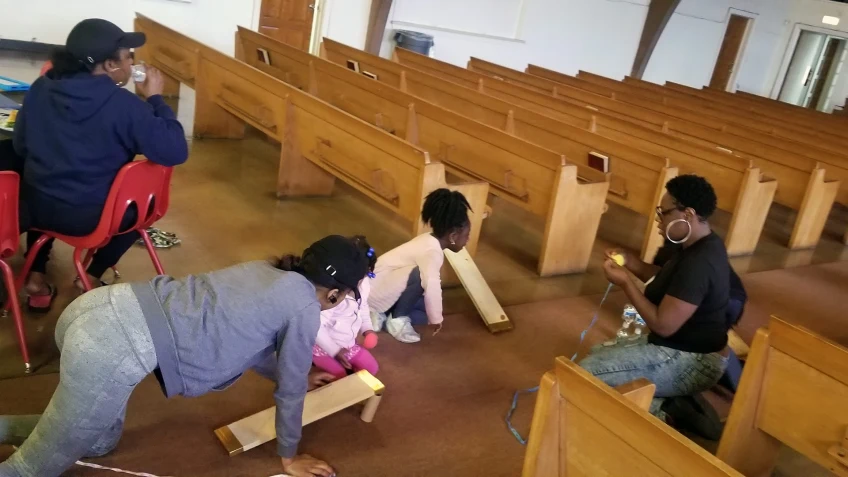
Underappreciated, our hallways tend to be a path from one room into another in our homes. Why not make them a venue to help your kids think like scientists and practice science inquiry in their everyday lives instead? In this activity, you will build ramps to play while testing different heights, distances and speeds.
But first, learn what a ramp is with Abby and Elmo.
Learning Goal
Children will practice asking and answering questions about the natural and human-made world. They will also get familiar with the science concepts of making observations and asking questions about the world around them, while also making connections to what they already know. Children will notice, connect and wonder how angles impact the speed of objects rolling down ramps of different heights. This activity will help children investigate answers to questions, describe objects according to their properties, sort and compare objects and make observations.
Materials
- Items to create ramps: Books, game board, cardboard, wood blocks or other items with a flat surface, etc.
- Items to prop up ramp: Blocks, plastic cups, water bottles, shoe boxes, baskets, cereal boxes, food storage containers, etc.
- Objects that may slide or roll: Toilet paper rolls, marbles, crayons, rolls of tape, toy cars, small balls, etc.
- Paper and marker
Instructions
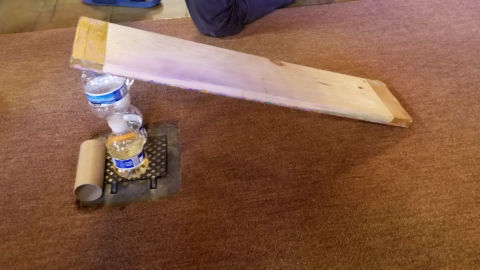
Step 1 – Make a Ramp
Place your gathered objects in three different piles at the beginning of the hallway: flat surfaces for ramps, objects to prop up the ramp and objects to slide or roll. Create a ramp at the beginning of the hallway by leaning a book against a stack of books, a wooden block or any of the other prop items gathered.
Chat with your child as you set up in the hallway together. Explain ramps are simple machines and use vocabulary such as “incline” and “angle.”
Step 2 – Predict
Ask your child to choose an item that may roll from the pile and discuss whether they expect it to slide or roll. Use hand motions to describe the difference. Ask questions to help your child form predictions, such as, “What do you think will happen? Do you think this will slide, roll, or not move?”
Step 3 – Observe
Slide and Roll! Release each item from the top of the ramp. Discuss the results. Sort through all the objects and make piles for those that slide, roll, or stay put. Describe the differences and similarities.
Step 4 – Make Another Ramp!
Make a second ramp together! Ask your children to choose the materials for a ramp and try different variations: Stand a book on its long edges to form a triangle, prop cardboard up on boxes, lay the edge of a game board on food storage containers — get creative to test different angles. Also, try making a ramp by holding up a flat surface and raise and lower it manually. Place two different types of ramps side by side to test different angles.
Step 5 – Test Again
Test objects to see if they roll or slide faster on one ramp or the other. Ask questions: What happens when you raise or lower the manual ramp? Do objects roll faster or slower on the second ramp? Which ramp helps items roll farther away from the ramp? Measure the distance between the end of the ramp and how far an object rolls by lining up plastic cups or other objects of the same size and ask your child to fill in the blank: The car rolled __ cups away. Release two items, such as two marbles or toy cars, at the same time to have them race down both ramps at the same time to see which rolls fastest. Try taping toilet paper tubes as speed bumps on the ramps: What happens now when you roll items down the bumpy ramps?
By supporting your little one this way, as a grown-up you are helping them set the stage to think, talk and act like scientists!
Keep the Conversation Going
- Discuss and describe the objects rolling or sliding down the ramp. Are some heavier than others? Are they larger? What materials roll faster than others?
- Go on a scavenger hunt with your child for other items that could be used as ramps around the house! What makes one item more useful as a ramp than another?
- You experimented with rolling things from the top to the bottom but Curious George shows us ramps can also be used to go from low to high.
Activity inspired by Curious George: Ramp-n-Roll | Lesson Plan on PBS LearningMedia, Peep and the Big Wide World’s Exploring Ramps, and Scholastic’s Activity Plan: Ramps.
This article was originally published on PBS SoCal’s At-Home Learning initiative.