Activities at home: Growing an herb garden in your kitchen
Learning Goal
To build an awareness of reusing household materials for science inquiry and exploration, as well as to become familiar with the process of plant growth.
Materials
4 Herb plants or seeds (such as thyme, rosemary or oregano)
Milk carton, jug or plastic gallon container (could be a water or juice container)
Cookie sheet or tray
Scissors
Soil
4 Popsicle sticks
Pencil and paper
Paint, colored paper, stickers and glue (optional for decorating)
Assembly
Step 1
Make the planter. Wash the empty carton or plastic gallon and allow it to dry. Lay the container on its side and cut off the top half. Flip the container upside down and poke a few holes at the bottom (this is to help the water drain out). Flip it back up and place it on the tray so the holes are touching the tray. If your child wants to decorate their planter, this is where they can use stickers or paint, paper and glue to cover the container.
Bonus: Discuss with your child the importance of recycling, upcycling and reducing waste during this step. Ask them if they know where garbage goes after the garbage truck comes. Have them look at the garbage in the garbage can and ask them if they could find other items in the kitchen that could be recycled or reused. Encourage them to think creatively about other uses to give these items a longer life! For more, here are two PBS KIDS games that talk about recycling: A Tale of Two Soup Cans and Super Cleaner Upper!

Step 2
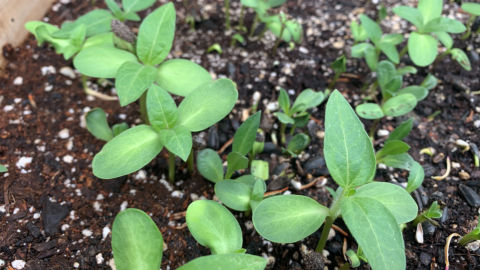
Plant your herbs. Now it’s time for your child to get their hands dirty! Fill up the carton with soil 2/3 of the way up. Poke four holes into the soil — make them about a finger deep for seeds but dig deeper to fit the roots if you’re using store-bought plants. Place your herbs in the holes in the soil and fill the rest of the hole with soil so each plant stays in place. Lightly water the soil. It’s okay if the water trickles down and drains out — that’s what the tray is for.
Bonus: If you’re using store-bought plants, ask your child if they recognize any of them — Have they ever seen, smelled, tasted, or touched these herbs before? Share examples of their favorite foods that may contain these herbs, such as oregano in pasta sauce.
Step 3
Label your herbs and find a home for the planter. Write each herb name on a popsicle stick and insert it in the soil next to its corresponding plant. Discuss with your child options for the best new home for the planter, factoring in information about what plants need to survive (watch this video together to learn what makes plants happy). You will need a warm and sunny spot that fits the planter and the tray, perhaps near a window in the kitchen.
Step 4
Observe while nurturing. Ask your child to monitor the planter on a daily basis by gently feeling the soil. Is it still wet? Does it feel dry? Ask them to observe the plants. Are they green and growing or sad and yellowish? It may be time to water your plants — but not too much. Does a recipe call for one of the herbs in your planter? Discuss how to take what you need without removing the plant entirely.
Keep the Conversation Going
- Have your child make predictions about what will happen. Ask them to describe what the plants will look like in a day, a week, or a month. What color will they be and how tall will they grow?
- To take this activity a step further, keep a chart with your child to track plant growth. Ask your child what could happen if you add more or less water, or if the herbs might need more or less light. Discuss that water and sunlight are a plant’s source of energy. Watch this video to learn plant size and measurement vocabulary together.
- If you want another opportunity to see how plants grow other than from seeds or seedlings, you can try regrowing from a branch! All you need is a little rosemary branch, some water, sunshine and patience! To start, take your small fresh rosemary branch, (it can even be from fresh rosemary you get at the store, or, ask a neighbor if you can snip some from their rosemary bush) — put it in a little glass of water, find a sunny spot for it to sit in and voilá! After a couple of weeks, you’ll start to see roots grow out of it! Remember to keep adding water to the glass and replace it entirely around every week so it doesn’t get dirty. When it has plenty of roots, it’s time to transplant!
- You can also use this experiment to talk about how different types of plants need different types of soil, and what goes into the soil to help plants grow. Learn more here.
For more resources about gardening, here are some articles from PBS for Parents!
- How to Raise Environmentally Responsible Kids
- Gardening with Kids: How It Affects Your Child’s Brain, Body and Soul
This article was originally published on PBS SoCal’s At-Home Learning initiative.